Build a Chicken Coop with Run: The Essential Guide

A chicken coop is essential for any wannabe chicken farmer. You need to keep your chickens somewhere safe, so they don’t roam free and end up stumbling into local predators.
But if you want to go the extra mile, you should build a chicken coop with a run. This combines the safety of a chicken coop with some added practicality to let your chickens run around and get some exercise.
In this guide, you’ll learn exactly how to build a chicken coop with a chicken run. I’ll cover the materials needed, where to place your coop and run, what to put inside it, and much more.
Step 1: Find the ideal location for your chicken coop & run
Building a chicken coop anywhere in your yard with some extra space isn’t always the best idea. It’s the easiest, but there are three key things to keep in mind:
- Does the location deter predators?
- Is the site on solid ground?
- Will the place be protected from the elements?
The ideal chicken coop location will be somewhat close to your house in an area with some shade during the day while on level ground. According to OSU, it’s smart to have a chicken coop with run close to your house, as the constant presence of humans scares away lots of common chicken predators.
Having shade may also block the coop from airborne predators - PetHelpful notes that birds of prey are the third most common chicken predators, so an overhanging tree or bush keeps your hens out of their sight. This also adds some protection from severe rain, so the coop is unlikely to flood.
That’s also why building on level ground is critical. It prevents floods while also providing solid foundations so the coop lasts longer.
Step 2: Decide on the size of your coop & run
The precise size of a chicken coop or chicken run depends on how many birds you have in your flock. It also depends on the size of the chickens themselves.
There’s a very handy tool on the Omni Calculator website that lets you calculate roughly how much space you’ll need based on the size and number of chickens you’ll have.
Generally, a chicken coop without a run will need 10 square feet per chicken. If you add a run to the area, you’ll need an extra 4 square feet per chicken.
Step 3: Gather all the materials
The main materials for your chicken coop and run will be:
- Wood (pressure-treated is the most common and most affordable option here)
- Metal roofing
- Chicken wire
- Screws/nails
- Hinges & latches
- Wooden posts
- A gate
This will give you everything you need to construct a chicken coop with a chicken run. It’s not the trickiest DIY job on the planet - but you can always buy a pre-built chicken coop if you like. Have a look online for where to buy chicken coops if you’re strapped for time or have absolutely no DIY experience at all.
If you choose to do this, you can skip step four and move right on to step five!

Step 4: Build your chicken coop
As with any construction, start with the foundations.
Make a solid foundation using your wooden blocks. Aim to raise it slightly above floor level, as this can keep away snakes and other floor-bound predators. If you want, you could use concrete blocks here instead of wood.
Start creating the frame of the chicken coop with your wood. You should basically cut the wood to your desired lengths and place beams to make a basic frame. Of course, the roof forms part of this frame, so don’t forget that. You’ll be left with a chicken coop skeleton at this point - it shows you what the coop will look like; now you need to fill all the spaces.
Begin adding wooden slats to the frame and fleshing everything out. Leave some gaps for windows (which you’ll cover with chicken wire for extra safety). As you nail all the wood into place, you’ll gradually start seeing a coop take form. Get your metal roofing material installed on top too, and your coop is complete.
Well, it’s complete from the outside anyway - the next step in building a chicken coop is adding the necessary interior features.
You should lay down some hay or straw on the floor to make it comfortable for your hens. Likewise, you’ll need a few nesting boxes. One nesting box for every 4-6 hens is a good starting point, and they should be 12 x 12 x 12 inches in size.
You can construct these using any extra wood or buy nesting boxes online. When it comes to filling these boxes, consider using our washable chicken nesting pads. They’re reusable and provide a cushioned floor for your hens' eggs, minimizing the risk of cracking.
Lastly, you will need to build roosting bars for your chickens to sleep on at night. Again, you can buy these, but if you’ve got some spare wood lying around, they’re easy to make. Effectively, you’re constructing shelves for chickens. It sounds weird, but that’s what they are!
Make some shelves with very thin slats and angle them against the side of the chicken coop. Your birds will roost on them at night when they want to sleep.
Step 5: Build the chicken run
Remember, you’re making a chicken coop with a run, so you’re only halfway done!
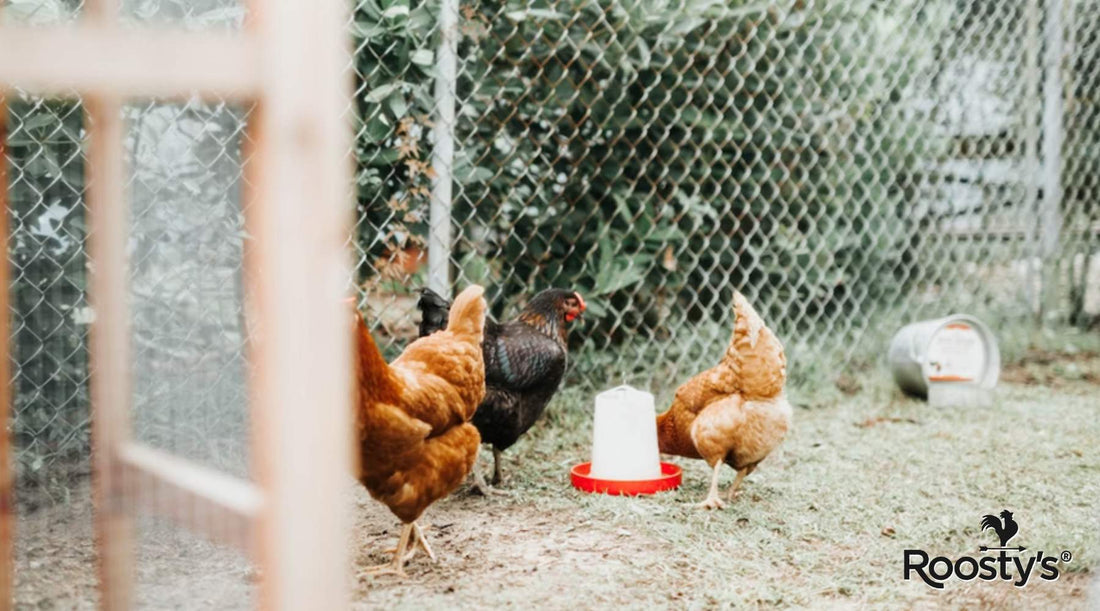
The chicken run is pretty much an outdoor area for your hens to roam around while remaining enclosed. All you need to do is construct a fence around the chicken coop.
Mark out the run’s perimeter so you know how large it will be.
From here, erect wooden posts and attach the chicken wire to them. You’ll now have a fenced-off area that should be tall enough to stop foxes, opossums, or other predators from jumping over.
It’s also a good idea to place some feeding areas in the run, meaning your chickens can graze or drink water as required. Check out the Roosty’s DIY Chicken Feeder Port Kit or our Chick Feeder and Waterer Kit as they’re both easy to make and install in your chicken run.

Be sure you place any feeders at reasonable heights so your chickens can easily access them. Our chicken feeding kits can be installed in any containers or buckets and placed on a concrete block. This will raise them to the ideal height for most full-grown chickens.
For chicks, feeders should be closer to the ground as they’re way smaller.
After all of this, you have created a lovely chicken coop with a run for your hens and chicks. It’s not too challenging, and the whole process can be sorted out in an afternoon. The biggest takeaway from this guide is to ensure the coop and run are big enough for your chickens. In fact, our pro tip is to maybe build everything a bit larger than expected. This will let you add more chickens without needing to completely rebuild and rescale everything.
If you have any more burning questions relating to this topic, keep reading as I’ve got a quick FAQs section you’ll find handy!
Frequently Asked Questions
Should I build or buy a chicken coop with a run for my hens?
It’s honestly up to you! If you’ve built things before, this won’t be a problem for you at all. But, if you’d rather get everything made for you, then buying a chicken coop is probably a better bet. This would mean you only need to build the chicken run, which is much easier as you’re pretty much creating a fence around the coop!
Can chickens live in a run or should they roam free?
Yes, chickens can live comfortably in a chicken run area. This gives them ample room to wander around every day, enjoying the sun and grazing on the ground below. Obviously, the bigger the run, the more space they have. As long as your run provides between 4-10 square feet per chicken, there’ll be more than enough space for them to have a great time.
Do I need a chicken coop or will a run be fine?
You absolutely do need a chicken coop for multiple reasons. Firstly, if your chickens are wandering around the run without anywhere to go inside, they’re exposed to predators. Secondly, chicken coops provide safe nesting spaces for your hens. It’s less likely that they’ll produce eggs if they don’t have a comfortable nesting box in a coop.
How often should I clean my chicken coop out?
It goes without saying that chicken coop maintenance is essential for the health and well-being of your hens. It’s mucky work, but you need to clean it out once a week to remove any droppings from the area. With our washable nesting pads, it’s way easier to clean out the nesting boxes as you just remove the pad, replace it with a clean one, and wash the old one.
