Upgrade Your Poultry Setup with a Nipple Chicken Waterer

When you have a flock of chickens, you need to keep them well-fed and hydrated.
Chances are, you already have some sort of feeding station set up (if not, check out Roosty’s DIY Chicken Feeder Port Kit to get started). However, you’re unsure about how to provide your chickens with the precious water they need.
Do you pour water into a bucket or dish and let them slurp it up whenever they like?
No, never do this. It’s incredibly unhygienic and will create a mess.
Instead, one of the best options you can use is a chicken waterer with nipple attachments. You might be raising an eyebrow at this already, and I can see why, but stay with me! This is a fantastic way to ensure your hens get their daily dose of water whenever they want. It’s a highly beneficial method when compared to other available options.
In this guide, I will help you learn how to create a chicken waterer with nipples while also explaining why this is a top idea. You will find plenty of extra tips related to maintenance as well.
Before I delve into all of that, there’s one big question on your mind…
What is a chicken waterer with nipple attachments?
You might see these waterers referred to as nipple drinkers or chicken nipples, but they all refer to the same system.
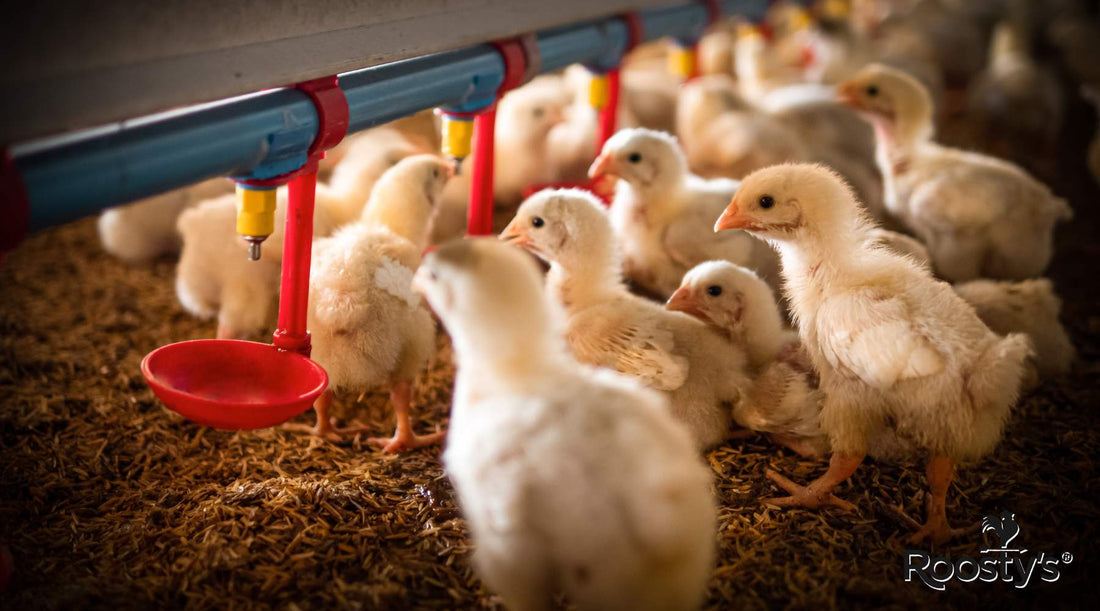
Essentially, a chicken waterer with nipples uses a special little pin or valve that works somewhat like a nipple. I know that sounds odd, but the concept is that your chicken pecks at this “nipple,” and it opens a small valve inside, allowing water to flow through. They can drink as much as they need, and when they stop, the valve closes, and the water stops flowing.
You install these on the sides of water containers or pipes, so your chickens constantly have a fresh supply of water. Unlike other watering methods, such as chicken waterer cups, the benefit here is that the water is never left out and exposed to the surroundings. It remains confined to the container that holds it.
There are many advantages to using this system, and I will explain all of them at a later point in this guide. Some of you might already have guessed a few, so see how many you can think of by the time we reach that section!
How to make a chicken waterer with nipples
You will be pleased to know that making a chicken waterer with nipples is quite simple. It’s a DIY project that should take about an hour once you have all the supplies together.
Speaking of supplies, what do you need when making a chicken waterer with nipple attachments?
- Chicken nipples - You can find push-in or screw-in nipples for your waterer. Push-in ones simply push into the hole, while screw-in ones are screwed into place. The choice is yours, but I recommend screw-ins as you can unscrew them to easily clean the valves.
- Any type of water container - Plastic buckets or containers work fine, so reuse any that you have lying around.
- A drill to create holes - Make sure the drill bit is large enough based on the size of your chicken nipples. If you don’t already have a drill or want a better one, there’s a good guide you can check out for a breakdown of the best options out there right now.
- Some type of sealant - This can be silicone caulk or rubber washers, depending on what works best. It’s handy to get both and try the rubber washers first. If they don’t create a good enough seal, try the caulk instead.
- Pliers to tighten the nipples.
- A lid for the water to keep it protected.
- A marker pen - This is optional, but it helps you map out where the nipples are going to go.
At this point, you have all the gear, but how do you go about constructing this watering mechanism? Before I dive into the steps, there’s another question that needs to be covered.
What are the main types of chicken waterers with nipples?
You have two main options:
- Vertical chicken waterers with nipples
- Horizontal chicken waterers with nipples
Vertical ones are placed underneath watering structures. Some people attach nipples to pipes where the water can drip through after the nipple is pecked and activated. In your case, with the supplies above, you’d install the nipple on the bottom side of the container or bucket. Gravity helps pull the water through and your hens can drink.
Horizontal chicken waterers with nipples are installed on the sides of containers. They poke out horizontally and your hens wander up to them and can drink without raising their head or looking up.
As with all suggestions in this guide, you can take personal preferences into account. It’s your poultry setup, so you’re in charge. If you were to ask me which type I prefer, then horizontal chicken nipple waterers are superior.
In fact, when I go through the steps on how to make a chicken waterer with nipples, I’ll show you how to create a horizontal one.
Why are horizontal chicken waterers better?
I prefer horizontal chicken waterers with nipples because they’re more convenient for your chickens.
With a vertical one, they have to raise their heads to drink. This can cause some issues as water may fall through too quickly when they peck the nipple, creating more mess in your chicken coop/run and even posing a risk of waterboarding your chickens!
As mentioned by Chicken Guard, chickens tend to hide away from water and wet weather conditions as their feathers aren’t waterproof. So, if they drink from a vertical waterer and get splashed, they’re unlikely to keep returning.
From a construction perspective, it’s also a bit harder to make a vertical chicken waterer with nipple attachments. You need to raise it above the ground, which means suspending a heavy container filled with water from a height. This raises additional safety issues for chickens and little chicks. What if the structure suddenly breaks and falls down on them?
I don’t even want to think about that, which is why vertical chicken waterers are less safe, less convenient, and not as good for your flock.

7 steps to make a chicken waterer with nipples
You have everything you need to make a chicken waterer with nipples, so let’s get started.
Step 1 - Clean the water container: Find the bucket or container you wish to use and clean it thoroughly. If you’re especially concerned about contamination, consider buying a brand-new food-grade container instead. Ideally, it should have a lid to prevent insects or debris from contaminating the water when it's filled up.
Once you have a clean container, you’re ready to proceed to step two.
Step 2 - Map out the nipple placement: This is where a marker pen comes in handy. Go around the side of the container and mark where you will drill holes for the nipples. There are two main things to consider here:
- Nipple placement
- Distance between nipples
For the most part, you should place the nipples towards the bottom of the container but still around the sides. This makes it easier for the chickens to reach them. Place the nipples too high up, and they won’t be able to peck them!
Leave enough space between the nipples for multiple chickens to get their heads in for a drink. If you have many chickens in your flock, you may need to create a couple of water feeders like this so everyone can drink at the same time.
Step 3 - Start drilling the holes: As mentioned earlier, make sure you have a drill bit that matches the size of the chicken nipples. In general, most nipples will suit a 5/16” or 11/32” drill bit. Most chicken nipple suppliers will state on the packaging what type of drill bit is suitable for their nipples. You might even get lucky and find a drill bit provided, though this is rare.
Aim the drill at your pen markings and drill straight through to create a hole for the nipples to be inserted. Try your best to keep all the holes equal with each other, though it’s not the end of the world if they're not perfectly aligned all around the container.
Step 4 - Insert the chicken nipples: Look at your chicken nipples, and you will see a “threaded” end, which is the part you are going to screw into the hole. Some nipples will have a little rubber o-ring in place to act as a washer to prevent leaks. If yours don’t, you can purchase washer kits and should be able to find one that fits perfectly.
Before screwing the nipple in place, you can apply some silicone sealant just under the rubber washer. This adds another layer of leak-proof protection. If you do this, wait a few hours for the sealant to dry before filling the container with water.
From here, simply start screwing the nipples into place, one by one.
Step 5 - Tighten with a wrench: You should now have all the chicken nipple waterers in place, but now you need to tighten them.
Use your wrench to go around each nipple, ensuring it is securely fastened. Try to avoid overtightening, as you might damage the plastic container.
Step 6 - Test with a bit of water: A common mistake is to fill the entire container with water at this stage. Don’t do this! Instead, use a small amount of water to test the nipples.
Encourage a few of your chickens to try them out, or press the nipples yourself with your finger. You are looking for two things to happen here:
- Water should drip out of the nipple.
- Water shouldn’t leak out from around the sides of the nipple.
If both of these things happen, it indicates that the nipples are installed correctly and there are no leaks.
If only the first thing happens, your nipples haven’t been screwed in correctly or perhaps the hole is slightly too big. You can take them out and use a bigger o-ring or more sealant to see if this helps. If it doesn’t, you might have to start again but use a smaller drill bit this time.
When no water leaks but also no water drips out of the nipple, there’s a problem with the nipple itself. Test all the nipples to see if it’s just one faulty nipple or if the whole pack could be faulty.
Step 7 - Fill the container all the way up: At this stage, you should be confident that your nipples work and the container doesn’t leak. Fill it up all the way and place the lid on top.
Just like that, you have a fully functional chicken waterer with nipple attachments. Repeat these steps as many times as needed, depending on how many waterers you wish to make.
As a good rule of thumb, aim to have as many nipples as you have chickens. If you have 10 chickens, this could mean two containers with five nipples each. The purpose is to ensure every chicken has a chance to drink at the same time if necessary.
Best place to put your chicken nipple waterers
After making your chicken nipple waterer, you have to decide where to place it.
Your first thought might be a big one: inside the chicken coop or outside in the chicken run/free-range area?
To be honest, there’s a lot of debate surrounding whether inside or outside waterers are better. Some experts suggest that inside is best because outdoor waterers may attract pests or predators trying to sneak a drink.
On the other hand, other poultry experts believe that outdoor waterers are better as they encourage the flock to spend more time outside. This means they get more exercise, fresh air, and vitamin D.
If you’re worried about making this decision, I’ll let you in on a little secret…it’s not that important!
This is mainly a matter of personal preference. If your chicken coop is large enough, put the waterers indoors. The nature of a nipple waterer means there should be less dripping, so the floor won’t get as wet. It also means your chickens have a water supply during the night or in bouts of harsh weather when they don’t want to go outside.
At the same time, you could have a waterer outside in a chicken run too! There are no downsides to having multiple waterers, except for a bit of added maintenance (more on that in a moment!). When your chickens are out roaming, they can access water without rushing inside the coop.
If you’re worried about chicken predators, an advantage of chicken waterers with nipples is that they mainly work for birds. The mechanism relies on a peck to allow water through. It’s highly unlikely that foxes or opossums will be attracted to the water because it’s not freely flowing or readily available.

Tips for maintaining a nipple waterer for your chickens
Maintaining your nipple waterer is incredibly important. What happens when you don’t do this?
- The water develops a buildup of algae
- Bacteria can form in the water supply, harming your chickens
- The water may run out, leaving your chickens with no hydration
- The water can freeze in cold conditions
- Leaks may occur over time, wasting water and causing a mess
With that in mind, a good maintenance schedule will revolve around preventing these issues from occurring. Here are some top tips for maintaining a chicken nipple waterer:
● Clean the waterer regularly: How often is “regularly”? Pineapple Farmhouse suggests that once or twice a week is the golden standard. Most experts agree with this as leaving the water for any longer can result in algae or bacteria build-up.
You need to take the whole container, empty the water and remove the nipples. This is why screw-in nipples are better as they can easily be unscrewed and screwed back into place. It’s also why it’s worth installing your nipples without any sealant before doing the first leak test. The sealant will mean you can’t remove the nipples. Instead, you’ll have to wash them while attached to the container.
Clean everything using hot soapy water to kill any bacteria. Scrub the sides of the container to prevent algae build-up and then rinse it all thoroughly. You must be thorough when rinsing to avoid any lingering suds that’ll get into your chicken’s water supply.
● Check the water levels daily: It’s unlikely your chickens will drain an entire bucket of water in a day, but you never know what can happen. Check the water levels every day and spot any warning signs of leaks. If the water level has halved in a few hours - and there’s a puddle on the floor - it’s clear you have a leakage problem.
The most common cause of leaks is a loose nipple, so give them a tighten if this happens.
Top up the water as well when it starts to get really low down. You don’t want to leave your chickens without water - particularly if you’re leaving the house for the whole day.
● Protect the water from contaminants and pests: Contaminants come in the form of many things. Airborne bacteria can get into a water supply, or you have bird droppings and feathers that may sneak in there. Pests are also a source of contaminants, so you must protect the nipple waterer from these issues.
The best approach is to put your water in a clean location elevated above the ground. Aim to have the nipples just a tad above chicken head height. This keeps them away from the floor and all the dirt/debris that may clog them up and cause bacterial infections in your chickens.
Secondly, you should always have a lid covering the top of the container. This deters pests and stops things from dropping into the water supply and contaminating it.
● Decontaminate the chicken nipples: You should wash the nipples regularly, but every month or so it makes sense to fully decontaminate them. The chicken experts at The Hen House say a vinegar solution is your best bet.
In fact, you can use this solution to clean the entire chicken coop. You want to avoid using bleach or chemicals as your chickens are live animals that can be negatively affected by cleaning products. Make a vinegar solution using equal parts vinegar and water, then soak the nipples in it.
This kills bacteria and also prevents clogging by removing any build-up or mineral deposits in the nipples. Give them a thorough rinse before reinstalling.
● Insulate the waterer during cold seasons: Chickens live outdoors, and their chicken coops aren’t going to come with a central heating system. This means the temperature will drop dramatically during cold seasons, possibly below freezing.
Consequently, you must insulate chicken waterers during these cold periods so the water doesn’t freeze. Of course, frozen water means your chickens will have nothing to drink until it thaws.
There are many ways to prevent freezing. You could insulate the container by wrapping it up in a blanket. Another good option is to install a small heater in the chicken coop and place the waterer near it. This prevents freezing and keeps the whole coop a lot warmer in the winter.
All of these tasks should form your chicken nipple waterer maintenance routine. It seems like a lot, but most stuff is done sporadically. The main thing to do is clean the watering device once or twice a week. It won’t take long - maybe 20 minutes of your time!
The benefits of using chicken waterers with nipples
Why should you upgrade your poultry setup with a nipple chicken waterer?
When compared to other watering methods, a nipple waterer is unique as it controls when the water comes out. Ideally, water should only flow when a chicken pecks at the nipple. This can create a long list of benefits for both you and your chickens. Some have been briefly mentioned already, but I’ll going to go through them all for you now!
● Cleaner water for your chickens: Yes, the biggest benefit is that your chickens get much cleaner water. Water is kept inside the container and doesn’t sit outside for hours at a time. This decreases the chances of certain strains of bacteria forming.
Therefore, you can clamp down on certain bacterial diseases forming in your flock. A highly common disease is mycoplasma synoviae infection, which affects the upper respiratory tract in chickens and other poultry.
Infections are passed when birds are close to one another - such as when they’re sharing a water feeder. It’s actually been advised by Washington State University that you use nipple waterers to cut down on this infection. Nipples mean chickens aren’t drinking from the same cup of water and they don’t backwash any bacteria into the water supply.
● More hygienic conditions in the chicken coop: Spilled water is a big cause for concern in chicken coops. It adds wetness to the litter materials on the floor, creating the perfect conditions for mold growth and bacterial formation.
This leads to something called coccidiosis, a serious infection targeting chicken’s digestive tracts. Penn State University notes that you should keep your birds on a thick, dry layer of litter. The dryness can prevent the formation of this bacteria and protect your birds.
Nipple waterers for chickens do this perfectly. When no leaks are present, water will not spill or drip onto the floor. The systems are designed to drip water into the chicken’s mouth, with the valve closing the moment they bring their beak away.
● Less chicken coop maintenance: You should conduct regular cleaning in your chicken coop to swap out the litter and remove droppings. But, with chicken nipple waterers decreasing spillages inside the coop, your maintenance tasks are easier.
You won’t have to clean things as often - and it won’t be as hard. Sweeping away dry and old litter is much easier than trying to clean wet and matted stuff from the floors.
If you want our advice, make your maintenance even easier by switching from traditional nesting beds to our washable nesting pads. They can be removed, cleaned, and replaced with ease.
● More egg production: Did you know that hens lay more eggs and have a healthier reproductive cycle when they get constant access to fresh, clean, water?
It’s true, as outlined by Poultry World, hens without access to fresh water show necrosis of the ovaries. That’s a fancy way of saying they stop producing eggs. With a nipple feeder, you ensure they always have a big supply of clean water whenever they need it. This can boost egg production while improving a chicken’s overall health.
● Better water conservation: Lastly, a big advantage of chicken waterers with nipples is the conservation of water. Traditional chicken waterers may waste a ton of water all the time.
Okay not literally a ton, but still!
Chickens splash water in the feeding cups or it gets moldy and needs to be replaced quickly. So much is wasted, while nipple waterers keep it fresh and clean for longer. Spillages don’t happen, so you conserve more precious water.

The problems with chicken waterers with nipple attachments
You’ve seen the benefits of these systems, so for the sake of fairness, I should address a few concerns.
I say a few because there are literally only three potential problems:
- Getting your chickens to use water nipples
- Leaks forming around the nipple installation points
- Feeding chicks
There’s a certain irony in providing a watering system with “nipples” for a species that doesn’t have them. This means a chicken is unlikely to naturally understand the purpose of a nipple. It’s not used to pecking or sucking on an appendage to get a drink. As such, you can see some issues when introducing this new system to your chicken coop.
Younger chickens will be more inclined to try it out because they don’t know any better. The best way to deal with this is by showing them how the nipples work. Press the metal nipple and show them the water coming out. Once they see where the water comes from, they’ll be more inclined to wander over and give it a try.
The good news is, once a few chickens start doing it, the others will soon follow. There just might be a period where nobody knows what they’re doing, so keep some water cups around just in case.
I’ve already spoken about leaks before, so there’s not much more to add. Check the nipples as part of your maintenance routine and use rubber o-rings or sealant to prevent leaks. Ensure the nipples are always tightly secured as well.
When it comes to feeding baby chicks, a horizontal waterer with nipples might be too high for them. Here, you should either consider a small vertical one that’s a good height for them or use our Chick Feeder & Drinker Set that’s made for small chicks.
Give your chickens fresh water with nipple waterers!
It’s now time to round off this guide with a few final thoughts.
A chicken waterer with nipple attachments is a fantastic system to control the flow of water for your flock. It reduces spillages, keeps the water cleaner, and improves the general hygiene of a chicken coop. In turn, this can reduce the risk of infections while making your maintenance tasks a bit easier.
Making a DIY chicken waterer with nipples is a simple task that any DIY beginner can try. To quickly recap what you need, get your hands on the following supplies:
- Chicken nipples
- Any type of water container
- A drill
- Some type of sealant
- Pliers
- A lid
- A marker pen
Then, follow the steps outline earlier to make your waterer from scratch. Place it outside or inside depending on your preference, but be sure you conduct regular maintenance so the water stays fresh and your chickens are free from diseases.
Just like that, you’ve got the ideal water-feeding system for your poultry flock!
