Ventilation for Chicken Coop: Keep Your Flock Healthy and Happy

When raising chickens, it is important that their health and well-being are prioritized at all times.
For example, you wouldn’t go a day without ensuring they’ve been properly fed, as this is integral to maintaining their health.
However, you must also create a safe living environment for them.
One way you can achieve this goal is by ensuring that their coop is well-ventilated all year round.
After all, failure to do so could leave your chickens at risk for various health complications, alongside creating an inhospitable living environment.
In this blog article, we’ll talk you through the basics of chicken coop ventilation so that you know precisely how to ventilate your chicken coop and the importance of doing so sooner rather than later.
This way, you can ensure that you keep your clock happy and healthy with minimal stress.
How to ventilate your chicken coop.
In order to ventilate your chicken coop, you need to create a pathway through the coop for air to flow through the space.
This can often be achieved by sawing holes, often referred to as vents, on either side of the coop.
This way, none of the moisture or humidity produced by your chickens is trapped within this confined space, and air can flow through the coop freely.
This also works to keep your coop at a safe temperature for your chickens, especially during the summer when things tend to be a little hotter.
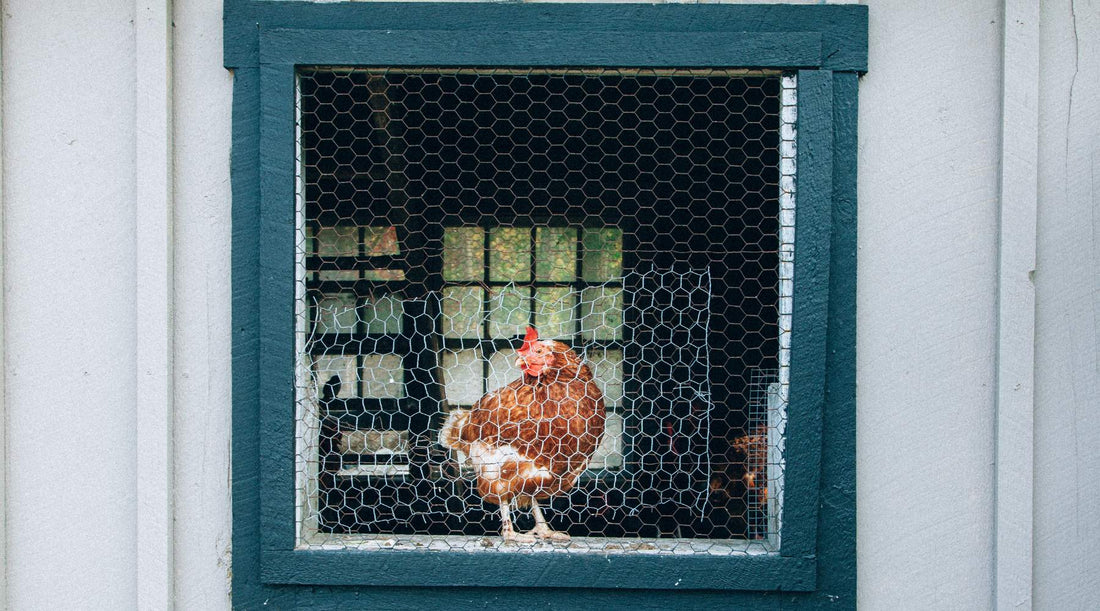
Installing windows and doors can also help improve ventilation, but this should not be the only method used.
After all, they do not help to keep the space ventilated when shut or closed - and you cannot keep them open 100% of the time, as doing so could leave your chickens vulnerable to predators.
Why do Chicken Coops need to be ventilated?
Many people may question why such effort needs to be taken to ensure chicken coops are well-ventilated, especially if your chickens get plenty of fresh air by roaming free during the day and only “sleep” in their coop.
However, it is crucial that chickens have consistent access to fresh air, even at night when they may be sleeping.
Chicken manure produces a great deal of moisture - and so does their breath.
As a result, the air within chicken coops is often relatively humid. Without proper ventilation, this humidity can lead to a range of issues, both within the coop itself and toward the health of the chickens.
For example, if your coop is constructed from wood, a build-up of humidity can cause the wood to rot away, which damages the structural integrity of the coop.
This means that you could be spending hundreds of dollars on repairs each year or that you need to replace your coop regularly - neither of which is ideal.
Poor ventilation can also lead to a build-up of ammonia in the space, which is incredibly toxic to chickens (and other animals).
Ammonia is often found in chicken manure, and a recent study found that exposure to high levels of ammonia can lead to, “difficulty breathing, irritation of the trachea (the breathing tube), air sac inflammation, inflammation of the mucus membranes of the eye, or a combination of these symptoms.”
Good ventilation within chicken coops can also allow for better temperature control all year round, whether you’re contending with a scorching summer or a freezing winter.
This is important when you consider that in order to remain healthy, chicken coops should remain at a temperature between 65° and 75°F. If the temperatures exceed this, the health of your chickens could be put at risk.
This is because chickens do not have sweat glands, making it harder for them to cope with extreme temperatures.
On a similar note, if poor ventilation means your coop is too cold, your chickens may suffer from frostbite or other similar conditions.
While frostbite is not necessarily fatal, it is a fast-spreading infection that can lead to a range of problems for your chickens - problems that can easily be avoided by ensuring that the spaces are well-ventilated to begin with.
In short, good ventilation is essential, and it's something that you should make a priority moving forward.
What are the signs of a poorly ventilated chicken coop?

There are many signs and indicators that could suggest that your chicken coop is poorly ventilated (and that you need to do something about it).
This includes:
- A foul older within the coop.
- High levels of humidity within the coop.
- Mold growth or build-up on bedding or wooden structures within/around the coop.
- Your chickens are showing signs of sickness, frostbite, or respiratory distress.
If you’ve noticed any of the above signs or symptoms, do not worry - you’ll notice that things get better relatively quickly once you’ve resolved ventilation issues using the step-by-step chicken coop ventilation guide below.
Essential Ventilation: How to Properly Ventilate Your Chicken Coop
Now that you understand the importance of proper ventilation within chicken coops, it is time to actually get started on learning how to ventilate these spaces in the most effective way possible.
After all, this is something you can easily do yourself - and it should not take all that long either! In fact, you could likely tick this task off your to-do list in just a few short hours.
To ensure that your chickens get access to essential ventilation, you should:
- Ensure that you install enough vents within the coop.
- Gather the relevant supplies or materials.
- Use a hole saw to create vents.
- Cover vents with mesh or a vent cover.
1. Determining the Number of Vents Your Coop
If you are going to install some form of ventilation system into your chicken coop, the first step of the process is determining how many vents you actually need to install.
Of course, this could vary depending upon a range of factors, including the size of the coop or the number of chickens you are caring for.
For example, larger spaces that are home to a greater volume of chickens will likely need more ventilation than spaces with fewer chickens.
Furthermore, if you have large doors or windows installed within your coop already, this could also mean that you can get away with having fewer vents.
However, a general rule of thumb is that you’ll need “1 square foot of ventilation per 10 square feet of coop floor space.” Using this logic, you should be able to determine how many vents you must install within your coop, though you could always ask for a second opinion if you are unsure.
2. Gather your materials.
Once you have decided upon the number of vents you’ll need to keep your flock happy and healthy, it is time to gather the relevant materials needed to carry out the job.
Fortunately, this is a relatively inexpensive task, as you’ll likely already have many of the tools and materials needed lying around your home. If not, they can often be bought cheaply from your local DIY store.
To install vents in your chicken coop, you’ll need:
- Measuring tape & Marking Pencils (to ensure your placing the vents in the right spaces at an equal distance from each other)
- Hole Saw (to create the ‘vent’ holes themselves)Mesh (to cover the holes and protect your chickens from rats and pests while still allowing for the steady flow of air through the coop).
- Wood & Hinges (to create vent doors/latches)
3. Create the vents.
You should use a hole saw or a similar tool to create the vents themselves.
To allow for proper chicken coop ventilation vs. draft, you should ensure that the vents are evenly spaced out. This will allow for a steady flow of air to pass through the coop.
Ideally, they should be as far from the coop floor as possible, as this can prevent drafts, particularly during the winter months.
Plan out where you’d like to place the holes/vents ahead of time, marking them with a pencil.
This will make it easier for you to complete the task quickly and effectively and reduce the chances of you making any mistakes.
4. Cover with mesh or wire.
Once you’ve created the vents, it's vital that you cover them with some kind of mesh or wire.
This, of course, will not limit the flow of air through the space but will act as a barrier for rats and other pests - ensuring they’re unable to enter the coop.
5. Install vent covers.
Installing vent covers is not a necessity, but it can come in handy during the winter months when your focus will also be on keeping your chickens warm in colder weather.
Install vent covers, such as latches, also gives you more control over airflow as you can open and close them as necessary, as opposed to leaving them open 100% of the time.
Ventilation For Chicken Coops: Creating the Perfect Environment for Your Chickens

As discussed above, it is relatively easy to set up a ventilation system in your chicken coop.
You simply need to create a series of small, evenly-spaced holes in the surface of the coop (high up when possible), which will allow air to flow through the space.
You should then cover these vents with a protective mesh and a vent cover. All in all, the process should not take more than a few hours to complete, and there are tutorials to follow online should you need further instance.
Installing vents within your chicken coop will create the perfect environment for your chickens, ensuring they thrive all year round.
Not only will this guarantee that your chickens are happy and healthy, but it will also give you greater peace of mind moving forward!
FAQ
How important is ventilation for chicken coop?
As mentioned above, ventilation within chicken coops and enclosures is important because it "supplies fresh air that is essential to sustain life. It also helps reduce the extremes of temperature, humidity, and air contamination to tolerable limits for confined chickens"
Various studies have also found that ventilation plays an important role in hens' egg production, which could mean that it is a great way to improve egg yield or the quality of eggs produced within your farm.
Another benefit associated with ensuring that your chicken coop is well-ventilated is the fact that it can help to reduce odors too.
After all, it means that foul smells are not trapped within a confined space, making them easier to deal with as a whole.
Of course, you should still ensure that your coop is cleaned out regularly. For example, you should use washable chicken nesting pads that can be cleaned quickly and easily.
How much ventilation does a chicken coop need?
Unfortunately, there’s no one answer to the question, “How many vents should a chicken coop have?” because, as mentioned previously, the exact answer varies depending on a range of factors.
For example, coops with fewer chickens within them will already have lower levels of humidity, meaning they don’t require quite as much ventilation.
However, it is good to follow the rules outlined above when installing vents within your chicken coop or chicken enclosure.
This means that you need 1 square foot of ventilation per 10 square feet of coop floor space.
Why do you need to add mesh to chicken coop vents?
There are many benefits associated with adding a mesh covering over your vents. Firstly, they protect your chickens and poultry against predators who may otherwise use these vents as an entryway into the coop.
This could include mice, rats, and even snakes, which could otherwise put your chickens in jeopardy. Similarly, it also protects them from insects, which may carry harmful diseases and bacteria.
Despite acting as a barrier against these risks, the mesh covers do not limit the flow of air throughout the space, meaning that you’ll still be succeeding in ensuring that you improve the ventilation within your chicken coop.
Should you clean your chicken coop vents?
The simple answer to this question is yes! You should clean your chicken coop vents regularly, just as you’ll clean or muck out the rest of the coop.
There are various reasons why this task is an important one. Firstly, if the mesh becomes blocked with dust, dirt, or other debris, this will act as a barrier to proper ventilation - which could mean that a lot of your hard work is undone.
Furthermore, as they’re continuously exposed to the elements, they’re likely to get dirty quickly.
When you clean your vents regularly, you’re also more likely to notice any maintenance issues - such as the wire mesh surrounding them slipping or coming loose - which means that you can resolve them before they become a significant problem.
What happens if your chicken coop is not well-ventilated?
If your chicken coop is not well-ventilated, then you may notice that your chickens (or other poultry) are more vulnerable to sickness and infection.
For example, they may show signs of respiratory distress, such as labored breathing, as they are not getting enough fresh air.
However, this could be indicative of a broader health issue, too. In extreme cases, poorly ventilated chicken coops or enclosures could lead to fatalities.
If you’re raising chickens to produce eggs, you may also notice a drop in the quality of your yield or that your hens are producing fewer eggs.
After all, the health of your hens is closely tied to their ability to lay healthy eggs - which could mean that your business suffers as a result of this.
Are there other ways to ensure that chicken coops are well-ventilated?
Installing vents using the methods outlined above is the easiest way to ensure your chickens can live in a safe environment all year round.
However, there are some other methodologies that you may like to use in conjunction with this.
For example, if possible, you may want to install a ventilation fan in your coop, too.
This can help improve ventilation and circulation within your coop.
However, it's worth noting that this comes with additional costs, as you have to pay to keep the fan running - whereas installing vents is much cheaper in the long term and is often the more effective method anyway.
Beyond this, simply opening the doors and windows of your chicken coop each day can help to improve ventilation, as it means the air is no longer trapped inside the confined space.
However, this method is less than ideal during the winter months, when you’ll want to protect your chickens from cold weather and conditions such as frostbite.
Ideally, you should aim to learn how to install vents in your chicken coop and use the above method to supplement these efforts.
This will create the best possible living conditions for your chickens, preventing a range of healthcare issues.
